27 November 2013

The Toolbox Part 2: Painting and Assembling Pewter Miniatures

In the second, and very late, Toolbox post I'll be going over the necessary tools for painting and assembling miniatures, most of which you can find at your Friendly Local Gaming Store (FLGS).  The first thing is of course paints and brushes.  Like the table in the last post, this one is pretty obvious, but the quality of brushes is very important.  Look for Red Sable for the brush material.  Your FLGS will have some quality brushes, but I've found that an art supply store will have a better variety and generally better prices.  Liners and round brushes are the most commonly useful, but a few larger brushes for base coating can also be handy.  Size 5/0 is generally the smallest you'll need, and the largest isn't necessarily much bigger.

Brushes and Hemostats!
Get a nice pair of hemostats as well.  You'll need them for holding your models while you paint them.  Grabbing them with your finger generally causes the paint to rub off, and re-basing can add ridges and lines that you don't want.  A table vise can also come in handy for larger pieces.  Remember though that hemostats have teeth in the jaws, so you don't want to risk denting your pewter by grabbing a piece that will be visible when you're done.

YARR!
For initial prep work, like removing mold flash and smoothing out seams, a hobby knife and a set of needle files will serve you well.  This first step is forgotten by many new painters and is crucial to giving your finished paint a clean and realistic look.  Plus, needle files are cheap at a hobby store.

$12
 The last thing you'll need is a pin vise and appropriately sized bits and wire to assemble the finished model.  Getting the right sizes to match with your technique will take some experimentation and trial and error but you'll get it eventually.  I use a #68 bit and 16 or 18 gauge modeling wire.  They don't fit together exactly, but I do like to have some wiggle room when assembling minis.

Pin Vise
I'll cover how to pin and why super glue without wire is bad in an upcoming post.

Happy building!

18 September 2013

The Toolbox Part 1

I've decided that before I start getting into the detailed tutorials about casting and building and painting, I should put up something a bit more basic, for the new modeler.  This will be the first in a series of core posts about all of the random stuff that every modeler should have in their inventory.

Part 1 will focus on the things you'll want to have before you pour your first cast.  There are tons of resources out there for this, and I'll be citing a few, as well as adding my own thoughts about some stuff that's not covered elsewhere.

Lets start with the obvious:  you are going to need a table.  You may think "Thanks, jerk, I know I need a table" but the choice of table is incredibly important for a number of reasons.

The top surface needs to be hard.  Even a finished wooden top is probably not going to be hard enough.

Pictured: Bad Table
Eventually I found a used drafting table at a furniture consignment store for about $35.  It has two-point adjustable height on all four legs, a nice hard MDF surface covered in a hard white paint, a tool cup attachment down one side, and a mount for an overhead light:

Now that's a work space
Speaking of lights, a good light with a natural bulb on a mobile arm is absolutely essential.  It's not as crucial to casting as it is to things like painting and assembly, but you will want good clear lighting over your entire work surface.  I'll write more about lighting in a future post on painting.

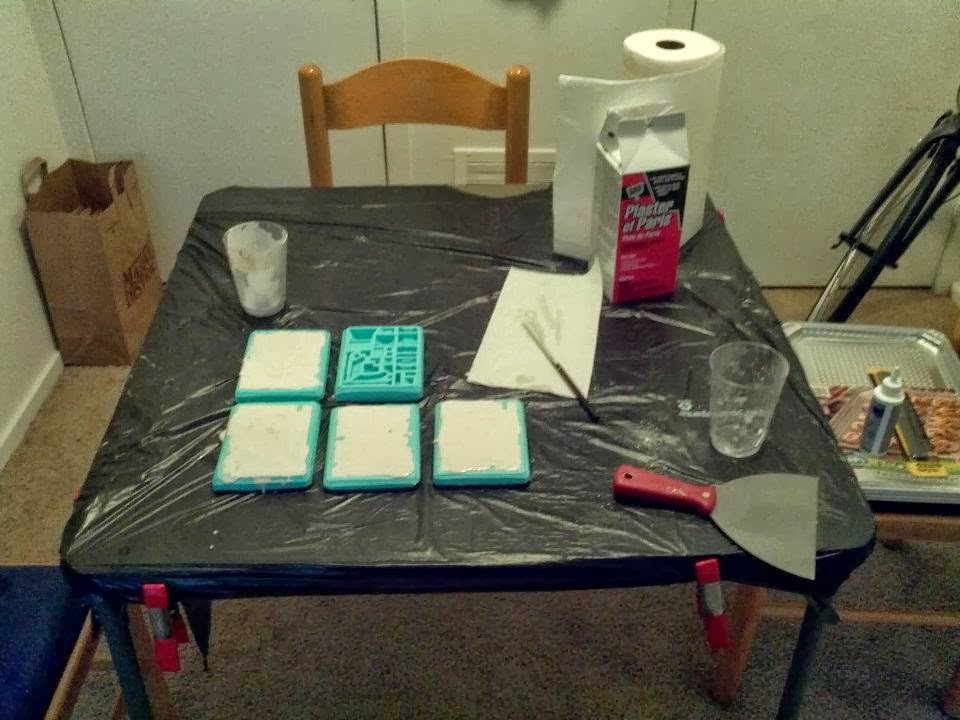
You'll also need a few hand tools.  Any list online will tell you that you absolutely need a putty knife, as the last step in casting is scraping the excess plaster from top of the molds to create a smooth surface.  It's also great for scraping the hardened scrap plaster off of your sweet table.  That red-handled one is still in use in my workshop.

A good steel file is another crucial part of the toolbox, though not one that you see on most online lists, as many people use sandpaper instead.  The one I found to be the best, and the most frequently used tool in my kit, is flat on one side with rough and fine surfaces, and then convex on the other side, again with rough and fine surfaces.  It's useful not only for smoothing out the 'scrape side' of the finished pieces but also for keeping the edge on your putty knife free of little plaster bits that can muck up your scrapes.

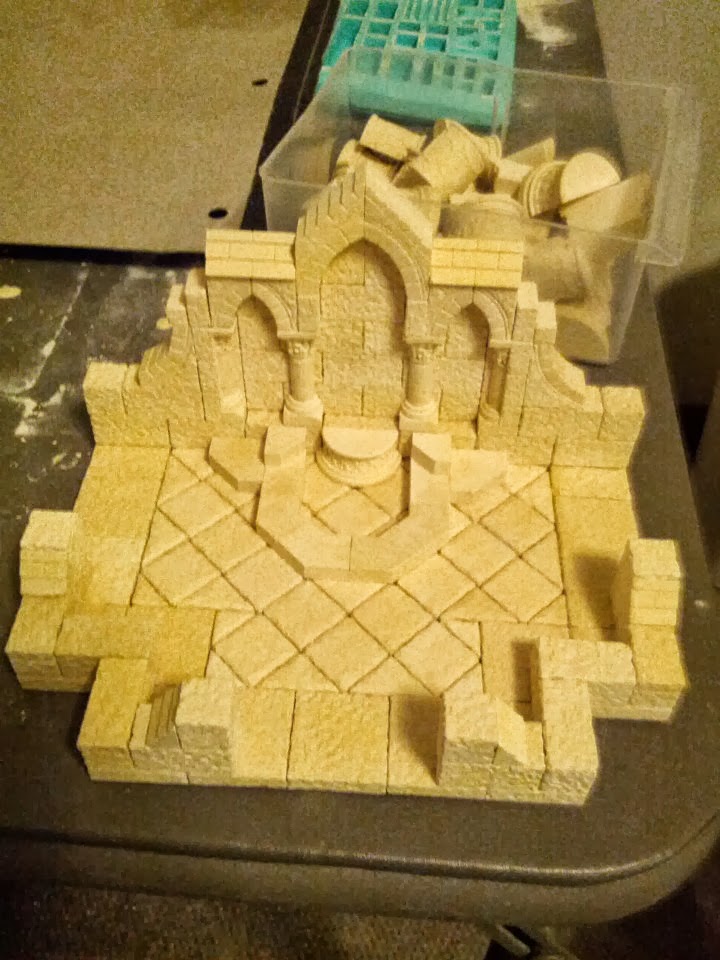
A steel file and a model of a fireplace
Third is your container sets.  Plastic solo cups for mixing plaster, a bucket for mixing wetwater if you choose to cast using wetwater, a construction bucket to store your plaster, some tiny plastic cups to scoop and sift the powdered plaster, and some disposable spoons for stirring and precision pouring.

The final tool that you'll need to purchase is a hobby knife, like an X-acto or similar product.  While mostly used for smoothing out tiny details, a hobby knife is also the perfect tool for etching indicators into the finished pieces, making them much easier to sort.  Make sure to get extra blades as well.  They dull very quickly, especially when cutting plaster or foamcore board.

Finally, what I call the bucket of diddlies.  I use a few old tobacco cans because of the wide opening and the fact that they're free with the purchase of roll-your-own tobacco (my preferred tobacco intake method), but mason jars or empty aluminum food cans work just fine.  Sorted out between them are about 100 safety pins and paper clips of all different sizes, some kebab skewers, a handful of pipe cleaners, some 200 grit sandpaper, a pair of scissors, a wire cutter, miscellaneous binder clips, push pins, an old 3/0 paintbrush and a multi-tool pocketknife.  You'll never know when you need a tiny wire bit or the saw tool on the pocketknife, so it's better to be prepared for anything than to ruin a whole day of casting because you're missing some important tool.

Next up - What to do with all of the new tools.

17 September 2013

The Learning Period

Design from Hirst Arts

I spent a lot of time and energy building projects based on the plans that came with my initial set of molds and learned a lot about casting, drying and assembly, as well as about the properties of different types of plaster.  Plaster of Paris was the first material I used.  The end products weren't great because PoP is a very weak material, generally having less than a 2,000 psi compressive strength, which basically means you can cut it with your fingernail easily.  I quickly switched to denture stone that I sourced through a friend who works for a medical supplier.  This turned out much stronger, as the compressive strength is about 8 times higher.

Design from Hirst Arts

Many of the first pieces, which are pictured in this entry, are designs from the Hirst Arts page.  Using available plans really helped with keeping me paying attention on fitting and shaping the pieces without having to worry about designing them (yet).  After building several models based on these standard designs I also began incorporating other materials.  Envirotex is my favorite because of how simple it is to use (Tutorial coming soon) and how effective it is at really bringing the pieces to life.  

First use of EnviroTex for water
I also got the opportunity to try out many different painting techniques and color schemes, eventually settling on my personal best practice of having a Painting Day every few weeks to celebrate the amount of building work I've completed.  With the piece shown in the last image on this entry, I also developed some valuable techniques for reinforcing weak connections, as PVA glue isn't exactly a strong bond in tiny amounts.

Design from Hirst Arts

There you have it.  This is how it all got started.  Anyone interested, I encourage you to go to the Hirst Arts site and check out the available molds.  I highly recommend the Gothic or Fieldstone sets as starters, as they are easy to cast and very straightforward to build.  There is also a huge variety of plans already available through Hirst that provide great instruction for the beginner.

First!

Hi, and welcome to Escapism, where I talk about miniatures that I make for tabletop and board games, especially Dungeons & Dragons, Pathfinder, ShadowRun, Descent: Journeys in the Dark and many others.

The hobby started just before Christmas 2011 when I found Hirst Arts and decided to try my hand at casting and building structures from plaster.  As it turns out this is a very fun hobby and I seem to have a talent for precision work with hard plasters like dental stone and UltraCal.  Over the next year or so my skill grew and I began to branch out into pewter and plastic miniatures and began incorporating different materials into my work.  

After much learning and much building (and much gaming with the finished products) I've made it here with the goal to expand my skills by communicating with the greater community of model builders and at the same time maybe teach someone something about the craft.  Here we go!